During the printing process, many users encounter various errors that affect print quality – from prints not sticking to the bed, layer shifting, to nozzle clogging, and more. In this article, 3Dmanufacturer will summarize common 3D printer errors and provide easy-to-follow, effective solutions that you can apply at home, helping you save time, materials, and effort.

Nội dung
Overview of 3D Printers
3D printers are essential tools in modern manufacturing but are not immune to technical errors during operation. Understanding common 3D printer errors and how to fix them can help you save time and costs while ensuring high-quality print output.
Concept
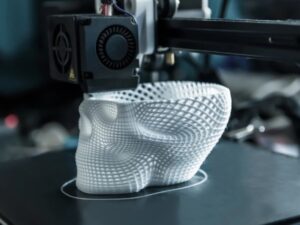
A 3D printer is a specialized device used to create three-dimensional objects based on digital designs, usually created with CAD (Computer-Aided Design) software. Unlike traditional printing methods, 3D printing works on the principle of layering – objects are built by printing thin layers stacked on top of each other from the bottom up.
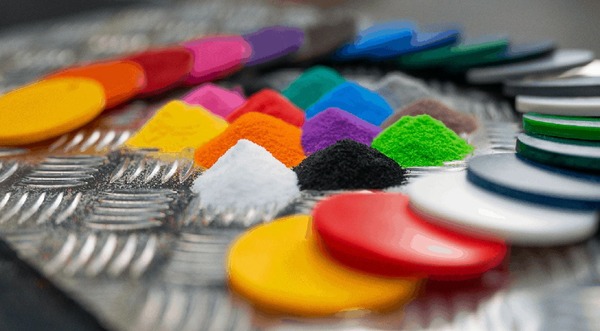
Materials used in 3D printing typically include thermoplastic plastics, metal powders, or resin, depending on the type of printer and technology employed.

Types of 3D Printers
Currently on the market, 3D printers are categorized based on the printing technology they use. Each technology suits different usage needs and printing materials, including:
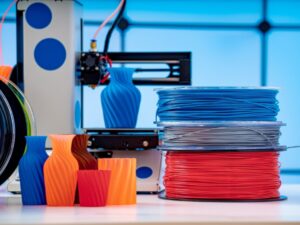
- FDM (Fused Deposition Modeling) 3D Printers: Use thermoplastic filaments (such as PLA, ABS) that are melted and extruded layer by layer.
- DLP (Digital Light Processing) 3D Printers: Use liquid resin that is cured by digital light.
- SLA (Stereolithography) 3D Printers: Similar to DLP but use a laser beam to harden each layer of liquid resin.
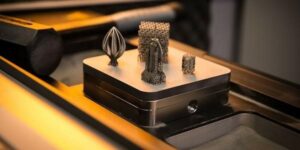
- SLS (Selective Laser Sintering) 3D Printers: Use a laser beam to melt and fuse plastic or metal powder into layers of an object.
- SLM (Selective Laser Melting) 3D Printers: Use a high-powered laser to completely melt metal powder, producing strong and durable products.
Challenges When a 3D Printer Encounters Errors
Despite many outstanding advantages, a 3D printer is still an electromechanical device and is inevitably subject to technical issues during operation. 3D printer errors can arise from various causes: internal system malfunctions, external environmental influences, or the use of unsuitable printing materials.
Each error can directly affect the print quality, resulting in wasted time, materials, and disruption of the production process. Therefore, early detection and timely troubleshooting are crucial to ensure a smooth and continuous printing workflow.

Common 3D Printer Errors and How to Fix Them
Below are some of the most common 3D printer errors, their causes, and effective solutions to help you quickly resolve issues and optimize printing performance.
Clogged Extruder Nozzle
Causes:
Nozzle clogs often result from plastic residue buildup, printing at an incorrect temperature for the material, or extrusion speed that is too high. Additionally, using low-quality filament or improper storage causing moisture absorption is a common cause.
Solutions:
- Use a specialized cleaning needle or the “cold pull” technique to clean the nozzle.
- Adjust the nozzle temperature according to the material (PLA: 190–220°C, ABS: 220–250°C, PETG: 230–250°C).
- Ensure extrusion speed is not too fast for the nozzle’s heating capacity.
- Use high-quality filament and store it in moisture-proof bags or sealed containers. If the filament is damp, dry it using a filament dryer or an oven at a low temperature.

First Layer Not Sticking to the Print Bed
Causes:
- The print bed temperature is too low.
- The print bed surface is contaminated with dust or grease.
- The distance between the nozzle and the print bed is too large.
- The first layer print speed is too fast, causing the filament to be dragged before it can stick.
Solutions:
- Set the print bed temperature appropriately (PLA: 50–60°C, ABS: 90–110°C).
- Clean the print bed with isopropyl alcohol.
- Re-level the print bed and check the distance using a thin A4 sheet of paper.
- Reduce the first layer print speed and set the cooling fan to a low level to prevent premature filament shrinkage.
- Use glue stick or specialized tape to improve adhesion.

Uneven or Insufficient Filament Extrusion
Causes:
- The filament spool is tangled, jammed, or empty.
- The nozzle is partially clogged.
- The filament drive gear is worn out or dirty.
- Incorrect extrusion speed or wrong filament diameter settings.
Solutions:
- Method 1: Check the filament spool and diameter (usually 1.75mm or 3.0mm). Enter the correct parameters into the printing software. Then adjust the extrusion amount by increasing the Extrusion Multiplier—for example, from 0.90 to 0.95 to increase filament output by 5%.
- Method 2: Check the filament flow at the nozzle. Use the Extrusion Multiplier function to increase or decrease filament output accordingly, ensuring about 5% more filament is extruded than before.

Warped Prints
Causes:
In addition to the common 3D printer errors mentioned above, warping of the finished product after printing is a frequent issue. When the filament cools too quickly, especially with materials like ABS, the lower layers tend to shrink and lift off the print bed surface.
Solutions:
- Adjust the print bed temperature up or down to suit the filament type.
- Thoroughly clean the print bed surface to improve adhesion.
- Use glue sticks or specialized adhesive sheets.
- Optimize cooling fan settings to avoid rapid cooling that causes sudden shrinkage.
- When printing with ABS, print inside an enclosed space to prevent sudden changes in ambient temperature.

Waves, Rippled Edges, or “Zits” on the Print Surface
Causes:
The appearance of waves or rippled edges – one of the common 3D printer errors is usually caused by an unstable mechanical system, loose parts, or printing at too high a speed, which leads to vibrations, especially when printing curves.
Solutions:
- Check and tighten all screws, belts, and pulleys.
- Reduce the print speed and adjust the design to minimize curves if necessary.
- Ensure the printer is placed on a flat, stable surface.

“Elephant’s Foot” Defect on Printed Parts
Causes:
The “elephant’s foot” defect (where the base flares out) occurs when the first layer expands due to the nozzle being too close to the print bed or the bed temperature being too high, causing the filament to spread. Additionally, excessively high bed temperature is another cause of this error.
Solutions:
- Slightly increase the distance between the nozzle and the print bed.
- Lower the bed temperature by a few degrees.
- Reduce the extrusion pressure (flow rate) during the first layer to better control its shape.
- Ensure the print bed is properly leveled.

Layer Shifting or Misalignment
Causes:
When print layers shift, the printed object shows many dents and loses its aesthetic appeal. This error can be caused by loose belts, loose pulleys, or bent guide rails.
Solutions:
- Check pulleys and belts to ensure proper tension.
- Carefully inspect the guide rails and replace them if any bending or warping is detected.
- Tighten all mechanical parts, especially connections to the drive motor.

Unable to Print Overhanging Structures
Causes:
Failure in printing overhanging (bridge) structures is a common 3D printer error that results in unsatisfactory finished products. The main cause is that the filament layers do not have enough time to solidify when printed in mid-air, causing sagging or collapse.
Solutions:
- Optimize printing settings for each overhanging area (reduce speed, activate cooling fans at the right time).
- Add support structures in the design software or experiment with printing different bridge lengths to identify the printer’s limits.

Layer Delamination
Causes:
- The nozzle temperature is too low, causing poor adhesion between layers.
- Printing speed is too fast, reducing the time the filament stays molten.
- The cooling fan runs too strongly, causing the filament to cool too quickly before properly bonding to the layer beneath.
Solutions:
- Increase the nozzle temperature to improve adhesion.
- Reduce printing speed to allow the filament more time to bond with the previous layer.
- Decrease the speed or power of the cooling fan.
- Adjust layer bonding settings in the printing software to enhance interlayer adhesion.

Unable to Print Thin Details
Causes:
The inability to print thin details can result from several factors, including an incompatible nozzle size, high printing speed, unstable printing temperature, or a model design that is not optimized for 3D printing.
Solutions:
- Method 1: Enable the “Single Extrusion Wall” mode in printing software such as Simplify3D or Repetier Host.
- Method 2: Redesign the part with a thicker wall if possible.
- Method 3: Replace the nozzle with a smaller diameter one to better suit thin details (for example, use a 0.2mm nozzle instead of 0.4mm).

3D Printer Maintenance Guide to Minimize Errors
Regular maintenance of your 3D printer not only helps reduce printing errors but also extends the device’s lifespan and maintains consistent print quality over time. Below are important tasks you should perform regularly to keep your printer operating optimally:
- Regular Cleaning: Frequently clean the nozzle, wipe the print bed, and clean the guide rails, gears, cooling fans, and other moving parts to ensure smooth machine operation.
- Check and Replace Components: Over time, some parts wear out or become loose, affecting print accuracy. Inspect the drive belts (tighten or replace if they are loose or worn), screws, and joints that may loosen due to continuous vibrations; tighten them to stabilize the mechanical system. Also, replace the nozzle and gears if signs of wear appear to ensure consistent and correct filament extrusion.
- Update Software and Firmware: Always update the latest firmware from the manufacturer to benefit from new features, bug fixes, and performance optimizations. Also, check and update your slicing software to ensure settings are compatible with your printing materials and current machine configuration.
- Regular Bed Leveling: Before each print, manually check and level the print bed using a thin piece of paper to measure the gap between the nozzle and the bed. For printers with automatic bed leveling, activate the feature to ensure high accuracy and reduce manual adjustments.

Understanding common 3D printer errors and how to fix them not only helps you save time and costs but also improves the quality of your printed products. Be sure to regularly check and maintain your printer to ensure stable operation and extend the device’s lifespan. If you need expert support or are looking for comprehensive 3D printing solutions, don’t hesitate to contact 3Dmanufacturer for assistance!